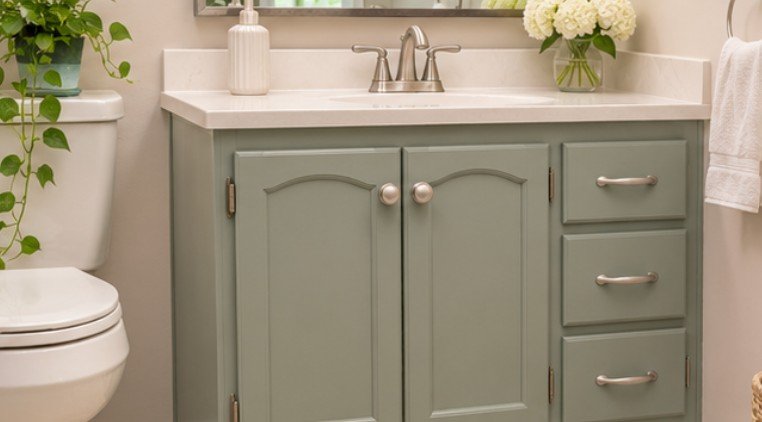
A bathroom vanity can look completely different after a few coats of paint, and you don’t necessarily need to remove its doors or drawers to achieve that transformation. The secret is careful preparation, the right cabinet paint, and a technique that prevents brush marks and sticky edges.
Learning how to paint bathroom vanity without taking it apart can save considerable time while refreshing an outdated bathroom. Whether your cabinet has a dark wood finish, scratched paint, or an aging laminate surface, you can give it a cleaner, more modern appearance without dismantling the entire unit.
However, shortcuts during preparation can cause peeling, uneven coverage, and premature wear. Here’s how to avoid those problems.
Can You Really Paint a Bathroom Vanity Without Removing the Doors?
Yes. Most bathroom vanities can be painted with their doors, drawers, and hinges attached, provided the surfaces remain accessible.
The challenge is reaching narrow spaces without coating hardware or accidentally sealing moving parts together.
This approach works particularly well for:
- Solid wood bathroom cabinets
- Previously painted vanities
- MDF cabinets with intact protective finishes
- Laminate surfaces when properly primed
However, severely damaged cabinets, peeling laminate, or swollen particleboard may require repairs before painting.
The American Coatings Association explains that paint undergoes several drying stages before reaching its final cured condition. This distinction matters because a cabinet that feels dry may still be vulnerable to scratches and sticking.
Gather the Right Supplies Before Starting
Choosing suitable materials makes painting attached cabinet doors much easier.
You’ll need:
- Cabinet cleaner, degreaser, or properly diluted TSP substitute
- 220-grit sandpaper or a fine sanding sponge
- Painter’s tape and protective drop cloths
- Bonding primer compatible with the cabinet surface
- Water-based cabinet enamel or specialty cabinet coating
- Two-inch angled synthetic paintbrush
- Four-inch foam or short-nap mini-roller
- Small artist’s brush for narrow openings
- Microfiber cloth and screwdriver
For cabinet paint, popular options include Sherwin-Williams Emerald Urethane Trim Enamel and Benjamin Moore ADVANCE.
All-in-one coatings such as Beyond Paint may reduce preparation steps, but they still require thoroughly cleaned surfaces and adherence to manufacturer instructions.
Why Ordinary Wall Paint Is a Poor Choice
Bathroom cabinets experience repeated touching, cleaning, humidity, and occasional water splashes.
Standard interior wall paint may not provide the hardness or blocking resistance needed for cabinet doors. A dedicated cabinet enamel is generally better suited to these conditions.
Choose a satin or semi-gloss finish for a practical balance of durability, appearance, and easy cleaning.
How to Paint Bathroom Vanity Without Taking It Apart: 8 Practical Steps
Most of the work happens before the first coat. Follow this sequence to keep the cabinet assembled while achieving smooth coverage.
Step 1: Remove Knobs and Protect the Hinges
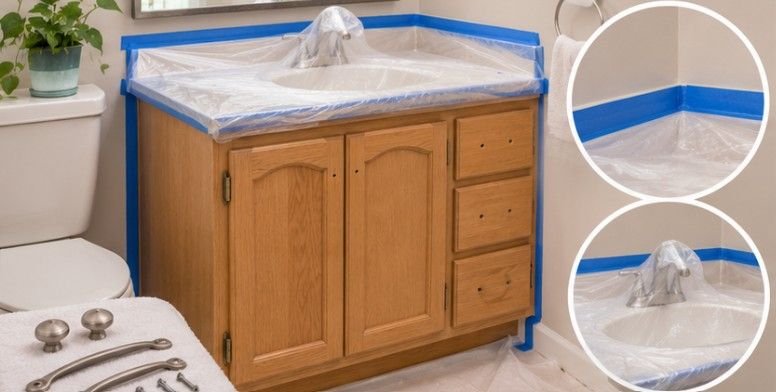
Start by removing drawer pulls, handles, and knobs. Leave doors and drawer fronts attached, but place painter’s tape over exposed hinges and other metal components.
Open the doors slightly to reach their edges. If drawers cannot be pulled forward sufficiently, paint only accessible areas rather than forcing the hardware.
Remove rubber door bumpers temporarily if possible, keeping them organized for later installation.
Step 2: Eliminate Soap Residue and Grease
Bathroom furniture accumulates residue from skincare products, hairspray, cleaning sprays, and daily handling.
Clean every exposed surface with a suitable degreaser or TSP substitute. Pay particular attention to areas surrounding handles and the bottom edges of doors.
Follow the cleaner’s label, rinse when required, and allow everything to dry completely. Never mix cleaning chemicals.
Step 3: Create a Surface That Holds Paint
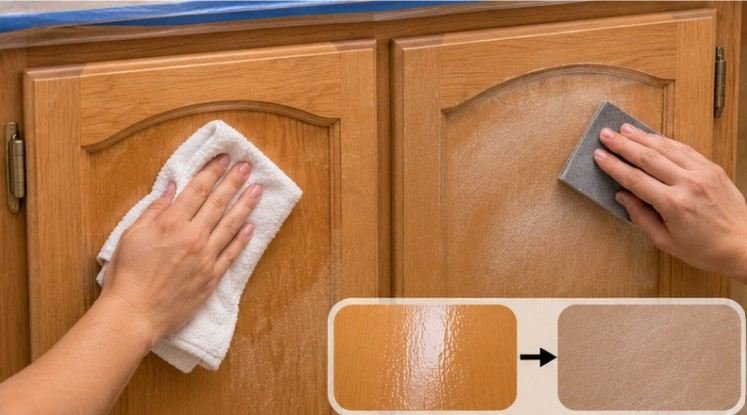
For sound, modern finishes, lightly scuff the surface with 220-grit sandpaper.
You aren’t trying to remove the existing finish. The objective is to reduce gloss so the new coating can adhere.
A compatible liquid deglosser may offer an alternative, although it does not repair damaged surfaces or replace all manufacturer-required preparation.
Remove sanding dust with a microfiber cloth.
Important: Cabinets in homes built before 1978 may contain lead-based paint. The Environmental Protection Agency’s lead-safe renovation guidance recommends special precautions and certified professionals when disturbing potentially contaminated paint.
Step 4: Mask the Countertop and Nearby Surfaces
Apply painter’s tape along the countertop, wall junctions, flooring, and cabinet interiors.
Protect the sink, plumbing fixtures, and nearby surfaces from accidental drips.
Use small pieces of tape around hinges rather than stretching a single strip across complicated shapes.
Check that doors can still move without pulling the tape loose.
Step 5: Apply a Suitable Bonding Primer
Primer improves adhesion, particularly on glossy finishes, laminate, and previously stained wood.
Choose a bonding primer appropriate for your substrate. Stained wood may also require a stain-blocking formula to prevent discoloration from migrating through the finish.
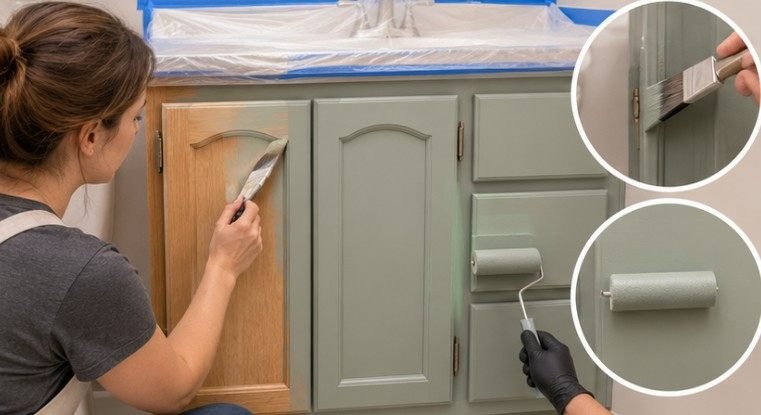
Apply a thin coat with a mini-roller, using a brush around decorative molding.
Allow the primer to dry according to its technical instructions. Lightly sand between coats only when recommended.
Some specialty cabinet coatings eliminate separate priming, but their surface preparation requirements still apply.
Step 6: Paint Narrow Details Before Flat Panels
Begin with recessed door profiles, corners, and narrow spaces around attached hinges.
Use an angled brush for detailed areas and a small artist’s brush where space is limited.
Avoid loading the brush with excessive paint. Thick application creates visible ridges and increases the possibility of doors sticking.
Keep paint off hinge joints, latch mechanisms, and drawer slides.
Step 7: Roll Thin Coats Across Larger Surfaces
Use a four-inch foam or low-nap roller to coat drawer fronts, cabinet frames, and flat door panels. Work with the wood grain or the longest direction of each panel.
Maintain a wet edge and avoid repeatedly rolling over paint that has begun drying.
Apply a second thin coat after the manufacturer’s specified recoat interval. Some products require additional coats, especially when covering dark cabinets with lighter colors.
Step 8: Remove Tape and Allow Proper Curing
Carefully remove painter’s tape according to the tape and coating manufacturers’ recommendations. Score dried paint bridges with a sharp blade if necessary. Keep doors slightly open while the coating develops sufficient hardness to prevent sticking.
Many finishes become dry to the touch within hours, but full curing can take considerably longer, sometimes several weeks.
Reinstall knobs only when the surface can tolerate handling. Avoid harsh cleaning or prolonged water exposure during the curing period.
How to Prevent Paint Damage in a Humid Bathroom
Moisture control matters just as much as paint selection. The U.S. Department of Energy identifies local bathroom exhaust ventilation as an important way to remove moisture and indoor contaminants.
Before painting, ensure the cabinet is dry and correct any plumbing leaks. Avoid showering immediately before applying paint, particularly in bathrooms with weak ventilation.
The American Lung Association also recommends choosing low-VOC products and increasing ventilation when using paints and other household chemicals.
Use an exhaust fan that vents outdoors, and supplement it with appropriate fresh-air ventilation during painting.
Common Mistakes That Ruin a Freshly Painted Vanity
Even high-quality cabinet enamel cannot compensate for improper application.
Skipping degreasing: Paint may separate or peel around frequently touched areas.
Applying heavy coats: Thick paint creates runs, uneven texture, and longer curing times.
Painting directly over laminate: Some laminate finishes require specialized bonding primer.
Closing doors too early: Fresh coatings can stick where cabinet doors meet their frames.
Ignoring damaged surfaces: Paint will not restore water-swollen MDF or permanently repair separating laminate.
For the best result, test your primer and paint system on a small inconspicuous area before coating the entire vanity.
Frequently Asked Questions
1. Can you paint a bathroom vanity without sanding?
Yes, certain bonding primers and specialty coatings allow minimal sanding. However, thorough cleaning is essential, and glossy surfaces may still require preparation specified by the manufacturer.
2. How long should bathroom vanity paint dry before use?
Light handling may be possible after 24–48 hours, depending on the product. Full curing can take several days or weeks. Follow the paint manufacturer’s instructions.
3. What is the best roller for painting cabinet doors?
A four-inch foam or high-quality short-nap roller generally produces smooth coverage on flat cabinet surfaces. Use an angled brush for corners and decorative details.
4. Will painting attached cabinet doors cause them to stick?
It can happen if paint accumulates along contact edges or doors close before curing. Apply thin coats, avoid painting hardware, and keep doors ajar during initial drying.
A Fresh Bathroom Look Without the Complicated Remodel
A successful vanity makeover depends less on dismantling furniture and more on understanding how coatings behave. Thorough cleaning, appropriate priming, controlled application, and patience during curing can turn an outdated cabinet into an attractive bathroom feature.
If you’re considering how to paint bathroom vanity without taking it apart, focus first on the cabinet’s condition and existing finish. Those details determine which products and preparation methods will work.
Take time to protect the surrounding surfaces, apply several thin coats, and keep moisture under control. The result can be a refreshed bathroom vanity that looks professionally finished without requiring an extensive renovation.