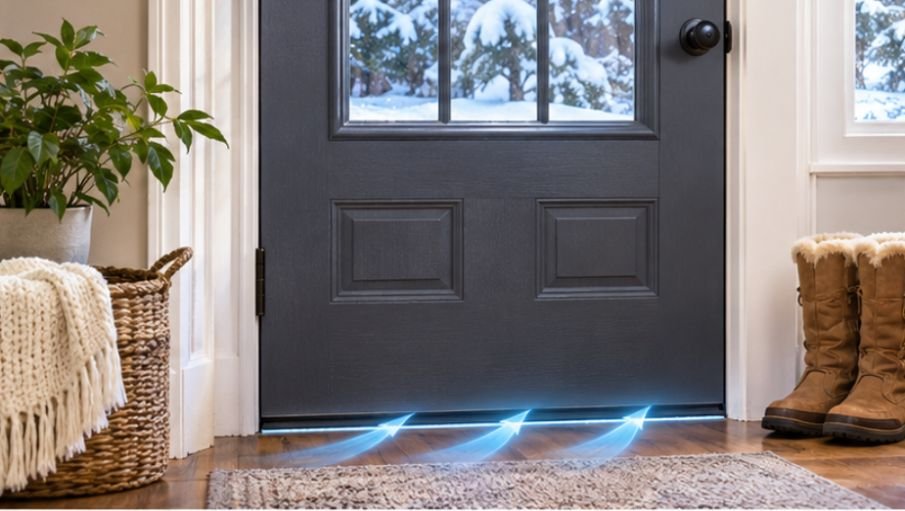
A narrow opening beneath your front door can make an entire entryway feel uncomfortable, even when the heating system works perfectly. Cold air slips inside during winter, while cooled indoor air escapes during summer.
Learning how to seal drafty exterior doors bottom gap can solve this problem without replacing the entire door. Installing a door sweep, replacing worn weatherstripping, or adjusting the threshold often restores a tighter seal.
According to ENERGY STAR, sealing household air leaks and improving insulation can reduce annual energy bills by up to 10%. A single door repair will not necessarily deliver that saving, but it can noticeably improve comfort.
Why Exterior Doors Develop Bottom Gaps
Exterior doors experience constant movement, temperature changes, and exposure to moisture. Over time, these conditions can weaken the materials responsible for keeping outdoor air outside.
Rubber seals gradually lose flexibility, adhesive strips loosen, and door sweeps wear down from repeated contact with the threshold.
Sometimes, the problem has nothing to do with weatherstripping. Loose hinges can cause the door to sag, creating uneven clearance between the bottom edge and the floor.
Wooden doors may also expand during humid summers and contract during dry winters. Homes in colder states, including Minnesota and Wisconsin, frequently experience seasonal temperature changes that make existing gaps more noticeable.
The ENERGY STAR air-leak guidance explains that warm indoor air rising through a house can draw colder outdoor air through openings around doors and windows.
Identifying the actual cause before buying replacement materials prevents unnecessary repairs.
Find the Exact Location of the Air Leak
Before installing anything, determine whether air enters beneath the door, around its edges, or between the threshold and flooring.
Try the Flashlight and Paper Tests
Wait until evening and close the exterior door completely. Have someone shine a flashlight along the bottom from outside while you inspect the interior.
Visible light indicates an opening that may allow air infiltration.
Next, close the door over a thin piece of paper positioned near the bottom seal. If the paper slides freely without resistance, the weatherstripping may not be making sufficient contact.
Repeat the test at different points along the door. Uneven results can reveal sagging hinges, an improperly positioned threshold, or a damaged seal.
These simple checks help distinguish a worn gasket from a door-alignment problem.
Similar air leaks can occur around older windows, where budget-friendly window insulation methods such as weatherstripping, removable caulk, and clear insulation film help reduce cold-air infiltration.
Choose the Best Door Bottom Sealing Method
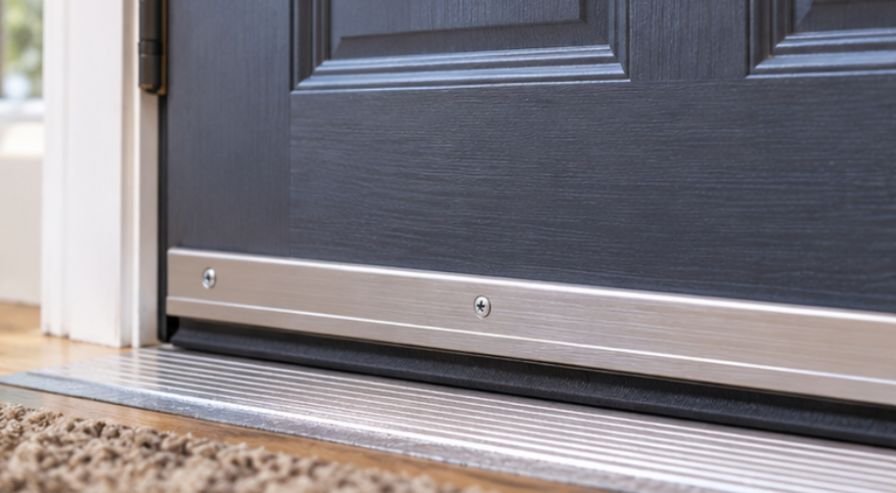
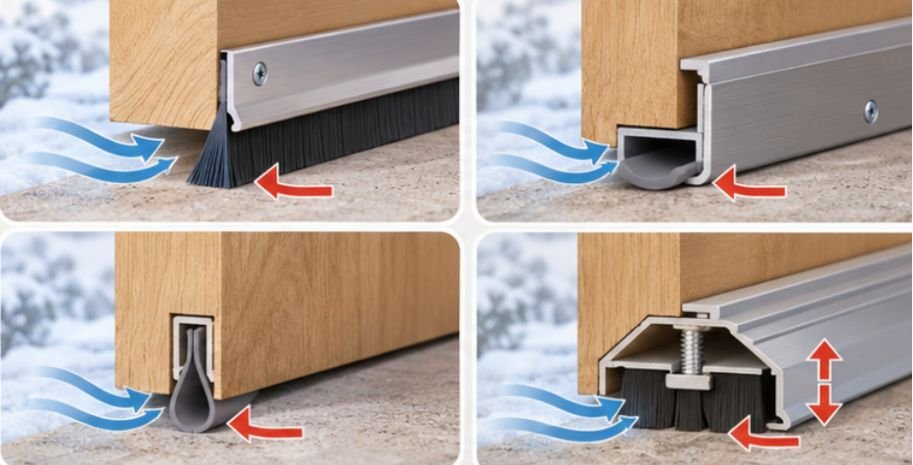
Surface-Mounted Door Sweep
A door sweep attaches to the interior face of the door using screws or adhesive. Its flexible rubber, vinyl, or brush edge meets the threshold and limits airflow.
This option works particularly well for ordinary wooden doors without factory-installed bottom channels.
U-Shaped Door Shoe
A door shoe wraps around the bottom edge, providing a protective seal underneath and along both faces.
Many designs accommodate small clearance differences, making them useful for older doors with worn bottom edges.
Kerf-Style Replacement Seal
Some fiberglass, steel, and insulated entry doors have factory-made grooves or channels that hold a rubber or vinyl seal.
Choose a replacement that matches the original groove spacing and attachment profile. A mismatched seal may slip out or prevent proper closing.
Adjustable Door Threshold
An adjustable threshold can compensate for a small clearance gap without replacing an otherwise functional sweep.
Only adjustable models have this feature. Some use visible screws to raise or lower the sealing surface.
How to Seal the Bottom Gap: Step-by-Step Installation
Most straightforward door-sweep replacements require only basic household tools and careful measurements.
Step 1: Measure the Door and Clearance
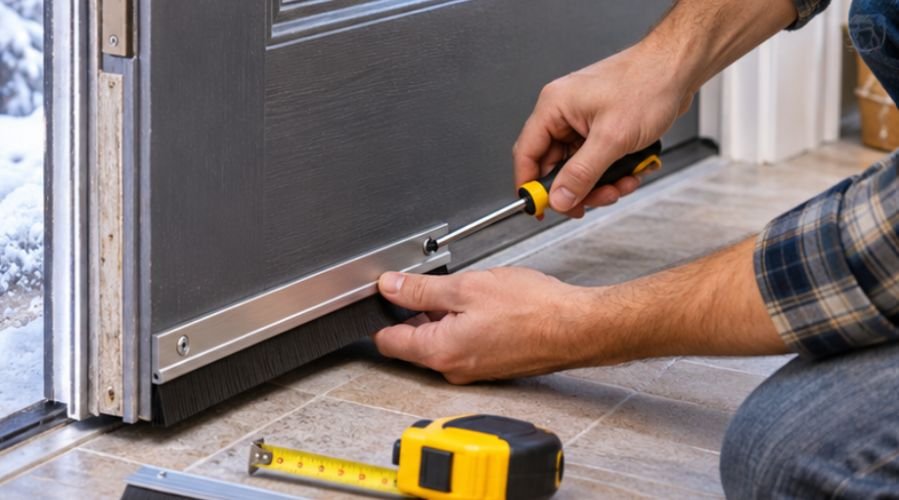
Measure the door’s actual width using a tape measure. Many American exterior doors are approximately 36 inches wide, although 30-inch and 32-inch models are also common.
Check the distance between the bottom edge and the threshold at several locations.
Purchase a sealing product designed to accommodate that clearance without excessive compression.
Step 2: Remove the Damaged Weatherstripping
Unscrew an existing surface-mounted sweep or carefully separate adhesive-backed material from the door.
For channel-style seals, remove the original insert according to the door manufacturer’s instructions.
Clean the mounting surface using a cloth and mild cleaner. Remove accumulated dirt, adhesive residue, and loose material before installing the replacement.
Step 3: Trim the Replacement to Fit
Mark the required length on the new door sweep or shoe.
Use a hacksaw for aluminum housings and appropriate scissors or a utility knife for flexible materials.
Work slowly around corners and exposed edges. An excessively short replacement can leave small openings where cold air continues entering.
Step 4: Install the New Seal
Position a surface-mounted sweep so the flexible edge makes light, continuous contact with the closed door’s threshold.
Mark the screw locations and drill pilot holes where recommended. Fasten the sweep securely without overtightening the hardware.
For adhesive models, ensure the surface is dry and follow the manufacturer’s application instructions.
Kerf-style seals require their attachment fins to sit fully inside the corresponding grooves. Press them into position evenly, using a protective wood block if gentle tapping is necessary.
Step 5: Adjust and Test the Threshold
Close the door and inspect its operation.
If the threshold is adjustable, turn its adjustment screws in small increments according to the manufacturer’s directions.
The finished seal should restrict airflow without scraping aggressively, preventing the door from closing, or interfering with the latch.
The Department of Energy’s exterior door weatherstripping guidance emphasizes maintaining proper door operation while reducing air infiltration.
Fix Persistent Drafts Without Replacing the Door
If the new seal does not solve the problem, inspect the hinges, threshold ends, and surrounding door frame.
Loose hinge screws may allow the door to hang unevenly. Tightening them can restore alignment and improve sealing contact.
A damaged threshold may require replacement, especially if it has become warped, corroded, or separated from the underlying surface.
Check whether water enters during heavy rain. A bottom seal cannot compensate for failed flashing, inadequate drainage, or a deteriorated sill.
Homeowners can also reduce heat loss through windows by understanding how thermal curtains retain warmth and help maintain a more comfortable indoor temperature during winter.
For homes with irregular floors, an automatic drop-down seal may be appropriate. These mechanisms lower a gasket when the door closes and retract when it opens.
The U.S. Department of Energy’s air-sealing recommendations distinguish weatherstripping for moving components from caulk used around stationary openings.
Avoid filling the moving gap beneath a door with caulk or expanding foam.
Mistakes That Can Make Door Drafts Worse
One common mistake is choosing a seal that is too thick. Excessive compression can make the door difficult to latch and accelerate gasket wear.
Another is installing a brush sweep where protection against wind-driven rain is necessary. Brush designs can reduce drafts but may not provide the same water resistance as an appropriate compression gasket.
Temporary fabric draft stoppers can improve comfort, particularly in rental properties. However, they do not provide a permanent exterior weather seal.
Never block a required ventilation opening, drainage route, or emergency exit mechanism. The Environmental Protection Agency also cautions that broader air-tightening projects must account for indoor ventilation and combustion safety.
Along with sealing unwanted air leaks, homeowners should maintain proper airflow by learning how to clean air vents themselves without relying on professional equipment.
Frequently Asked Questions
1. What is the cheapest way to seal a drafty exterior door?
An adhesive-backed door sweep is often an inexpensive solution. Choose one rated for exterior-door use and compatible with the door’s surface and threshold.
2. Can I seal a door bottom without removing the door?
Yes. Many surface-mounted sweeps attach while the door remains on its hinges. Some door shoes and replacement channel seals require additional clearance or temporary door removal.
3. How tight should an exterior door bottom seal be?
The flexible edge should maintain consistent contact with the threshold without substantial dragging. Excessive pressure can damage the seal and interfere with normal door operation.
4. Why does cold air still enter after replacing the sweep?
Possible causes include worn side weatherstripping, loose hinges, an uneven threshold, damaged corners, or air leakage around the door frame.
Small Repair With Noticeable Benefits
A draft beneath an exterior door rarely means the entire entry system needs replacing. Often, restoring the contact between the door bottom and threshold is enough to improve everyday comfort.
The most reliable approach begins with identifying the opening, selecting compatible weatherstripping, and checking the finished installation.
Homeowners should also inspect nearby frame seals and hinges rather than assuming every draft comes from the bottom edge.
For most households, this is a manageable maintenance project that helps keep heated and cooled air where it belongs. The key is creating a continuous seal without compromising the door’s movement, drainage, or safety.