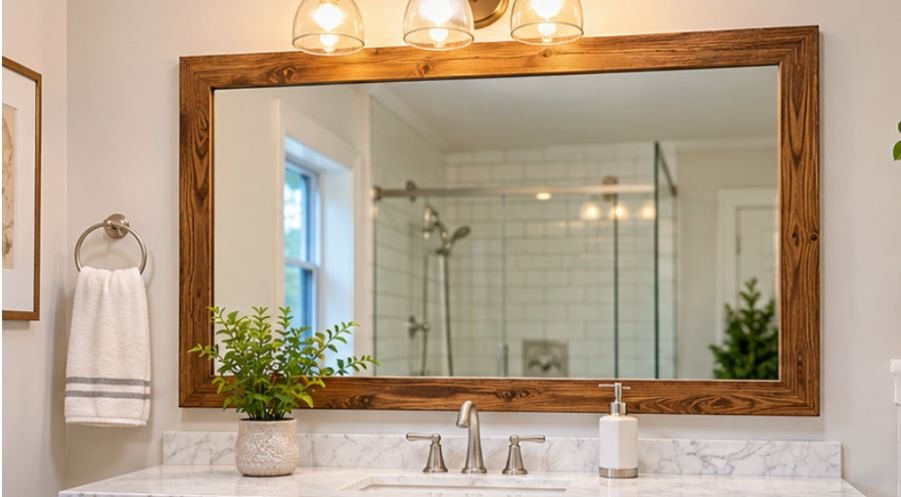
A plain bathroom mirror can look surprisingly expensive with just four pieces of wood trim. Instead of replacing perfectly good glass, you can give it a custom appearance without extensive remodeling.
Learning how to frame a bathroom mirror with wood trim is a practical weekend project that requires basic woodworking skills, careful measurements, and the right adhesive. The biggest challenge isn’t cutting the wood. It’s making sure the frame stays straight, protects the mirror, and withstands bathroom humidity.
Here’s how to get professional-looking results without paying for a custom mirror.
Why Wood Trim Is a Smart Bathroom Mirror Upgrade
Builder-grade bathroom mirrors typically have exposed edges and minimal decorative detail. Adding a wooden border creates definition while coordinating the mirror with surrounding cabinets, countertops, and fixtures.
Unlike replacing an entire mirror, framing allows homeowners to preserve the existing installation.
The same approach of upgrading existing surfaces rather than removing them applies to flooring, where homeowners can explore vinyl plank flooring over ceramic tile as a practical renovation option.
Similarly, homeowners can improve energy efficiency without replacing existing fixtures by learning how to insulate drafty old windows using affordable materials such as weatherstripping, caulk, and insulation film.
Wood trim also offers several design possibilities:
- Natural oak or stained pine for a warm, rustic appearance.
- White-painted molding for a traditional bathroom.
- Matte black trim for a contemporary design.
- Wide, flat boards for a farmhouse-inspired finish.
However, bathrooms introduce one complication: moisture. According to the University of Minnesota Extension, indoor humidity above 50% can contribute to moisture problems, including peeling paint and mildew. That makes proper sealing and ventilation essential for a lasting wooden frame.
Tools and Materials You’ll Need
Most supplies are available at American home improvement stores, including Lowe’s, Home Depot, and local lumberyards.
Essential Materials
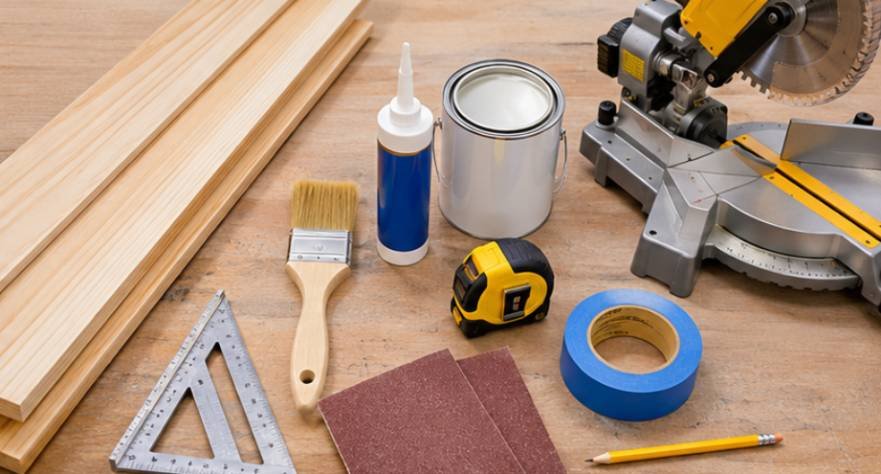
- Pine, poplar, or other suitable wood trim
- Mirror-compatible construction adhesive
- Wood glue for corner joints
- Wood filler or paintable caulk
- Primer and bathroom-appropriate paint or stain
- Water-resistant clear protective finish, if needed
- Painter’s tape and temporary support blocks
Recommended Tools
- Measuring tape and pencil
- Miter saw or manual miter box
- Level
- Sandpaper in 120- and 220-grit
- Caulking gun
- Cleaning cloth and glass-safe cleaner
- Safety glasses and hearing protection
For a simple rectangular mirror, four pieces of properly measured trim are usually sufficient.
The Occupational Safety and Health Administration emphasizes proper saw guarding, safe hand positioning, and eye protection when operating miter saws.
How to Frame a Bathroom Mirror With Wood Trim in 7 Steps
How to Reframe a Bathroom Mirror – LED Mirror World UK
Bathroom Mirror Placement Tips for Balance, Function, and Style – MirrorMate
Делаем раму для картин своими руками | ivd.ru
Step 1: Measure the Mirror and Surrounding Space
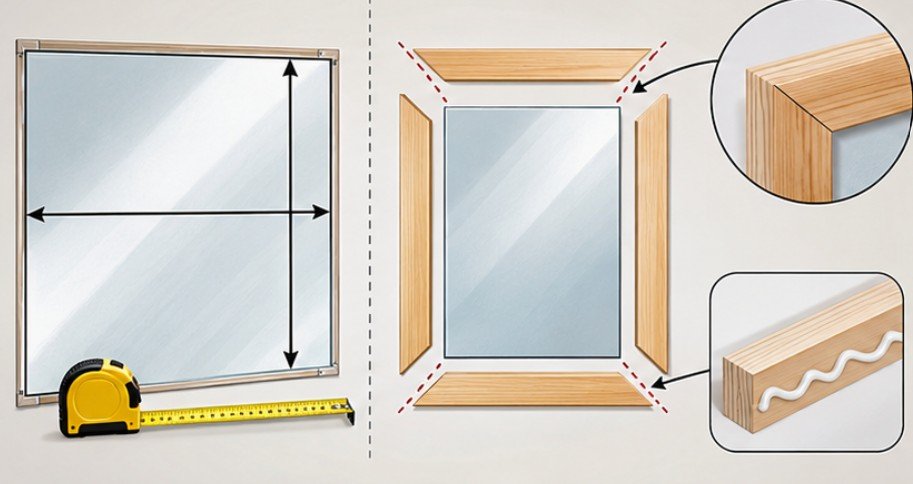
Measure the mirror’s height and width in at least two locations to identify possible irregularities.
Check how much space is available between the glass, countertop, light fixtures, and adjacent walls.
Decide whether the frame will overlap the glass or extend beyond its edges.
For example, a 36-by-30-inch mirror with 3-inch-wide trim can accommodate an overlapping frame that conceals the exposed perimeter.
Mark the desired inner opening before determining the finished outside dimensions.
Step 2: Inspect Existing Mirror Clips
Many bathroom mirrors are secured with plastic clips, metal brackets, or mounting channels.
Bulky clips can prevent wooden trim from resting evenly against the glass.
Possible solutions include carefully cutting shallow recesses into the back of the trim or using manufacturer-approved lower-profile mounting hardware.
Never remove structural mirror supports without confirming that another approved mounting method will safely hold the glass.
The National Glass Association recommends mechanical supports for most mirror installations and warns that incompatible adhesives can damage reflective backing.
glass.org
Step 3: Cut the Wood for Accurate Corners
For a classic picture-frame appearance, cut the ends of the trim at 45-degree angles.
Measure between the short points of opposing miters to establish the inner opening. The long-point dimension will be larger by twice the trim’s actual face width.
For instance, if the opening measures 30 inches and the trim is exactly 3 inches wide, the corresponding outside measurement is 36 inches.
A miter saw produces consistent angled cuts, although a hand saw and miter box can work for smaller projects.
Dry-fit all four boards on a flat surface before applying adhesive.
Step 4: Sand, Paint, and Protect the Wood
Sand the cut pieces with 120-grit sandpaper, followed by 220-grit for a smoother finish.
Remove dust before applying primer, paint, or stain.
For painted frames, use a suitable bonding primer and durable interior paint designed to tolerate occasional moisture.
For stained wood, apply a compatible clear protective coating according to the manufacturer’s directions.
Finish the front, back, ends, and cut edges before installation. This reduces uneven moisture absorption and prevents unfinished wood from appearing in the reflection.
Allow every coating to dry or cure as directed.
Step 5: Prepare the Mirror Surface
Clean the glass where the trim will attach, paying particular attention to toothpaste residue, cleaning products, and fingerprints.
Use a glass cleaner or cleaning method approved for both the mirror and the selected adhesive.
Avoid soaking the edges because liquid can reach vulnerable reflective backing.
Dry the surface thoroughly.
Next, position each wooden piece against the mirror without adhesive. Check alignment, corner connections, and clearance around nearby fixtures.
This trial installation helps identify problems before permanent attachment.
Step 6: Attach the Wood Trim Securely
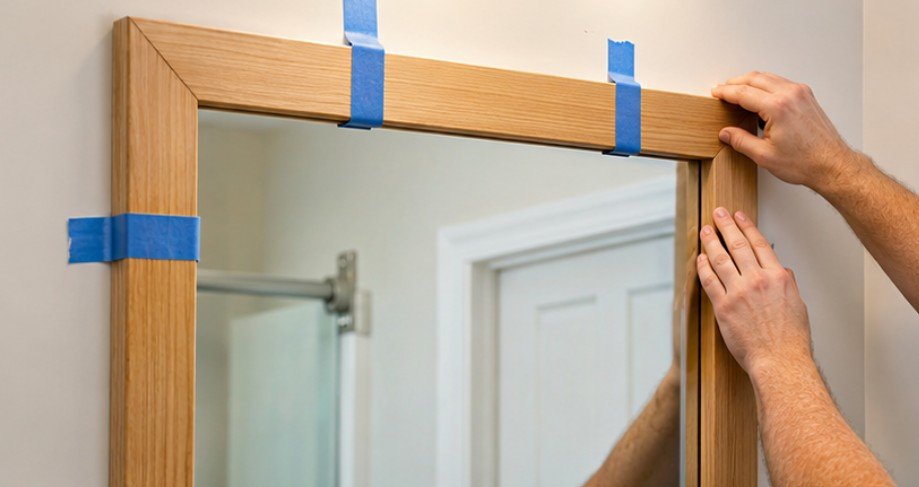
Choose an adhesive specifically approved by its manufacturer for bonding your wood material to mirror glass.
Apply it to the back of the trim according to the product instructions, keeping adhesive away from visible inner edges.
Position the bottom piece first if the mounting method permits, then add the sides and top.
Use temporary supports and painter’s tape to maintain alignment while the adhesive cures. Tape alone may not safely support heavier trim.
Alternatively, assemble a rigid frame beforehand and mount it using an appropriately rated fastening system.
Never assume standard construction adhesive is mirror-safe. Also, decorative trim must not replace the mirror’s existing structural supports.
Step 7: Fill Gaps and Complete the Finish
Once the adhesive has fully cured, inspect the frame for uneven corners or visible seams.
Apply wood filler to small painted-frame joint imperfections. Paintable caulk can disguise minor stationary gaps, while stainable filler is better suited to natural finishes.
Sand repaired areas gently and touch up the finish.
Finally, clean the mirror and inspect the complete perimeter.
Avoid sealing drainage or ventilation spaces required by the original mirror installation.
Common Installation Mistakes That Can Ruin the Result
A frame may look perfect immediately after installation but develop problems months later.
Watch for these common mistakes:
- Using ordinary adhesive without verifying mirror compatibility.
- Leaving the back or cut ends of wooden trim unfinished.
- Ignoring protruding mirror clips.
- Installing heavy trim without sufficient support.
- Applying too much adhesive near visible edges.
- Failing to allow enough curing time.
- Trapping moisture around the bottom of the mirror.
Another overlooked issue is insufficient ventilation. The EPA’s remodeling guidance explains that bathroom exhaust fans help remove moisture that accumulates through daily household activities.
Beyond controlling bathroom moisture, homeowners can improve seasonal indoor comfort by understanding how thermal curtains reduce heat loss and help retain warmth during winter.
A reliable exhaust fan protects more than the wooden frame; it also helps preserve surrounding paint and finishes.
Frequently Asked Questions
1. Can you frame a bathroom mirror without removing it?
Yes. You can attach lightweight wooden trim to an existing securely mounted mirror using a compatible adhesive and appropriate temporary supports.
2. What is the best wood for bathroom mirror frames?
Poplar is excellent for painted frames, while oak works well for stained designs. Proper sealing matters more than wood species alone.
3. How much does a DIY bathroom mirror frame cost?
A basic project may cost approximately 30–100 in materials, depending on mirror size, lumber selection, finish, and supplies already owned.
4. Can I install wood trim over mirror clips?
Yes, provided the trim is carefully recessed around the clips without compromising the mirror’s existing mounting system.
A Small Upgrade With a Lasting Visual Impact
A wooden frame can turn an ordinary bathroom mirror into a thoughtful design feature without the expense or disruption of replacing the glass.
The best results come from decisions made before installation: accurate measurements, suitable wood, properly sealed surfaces, and compatible adhesive. Taking extra time to check the existing mounting hardware is equally important.
I recommend starting with a simple, flat trim profile if this is your first woodworking project. It’s easier to measure, cut, and finish than elaborate decorative molding.
Ultimately, the goal isn’t simply to hide exposed mirror edges. It’s to create a durable, attractive detail that looks like it was always part of the bathroom.