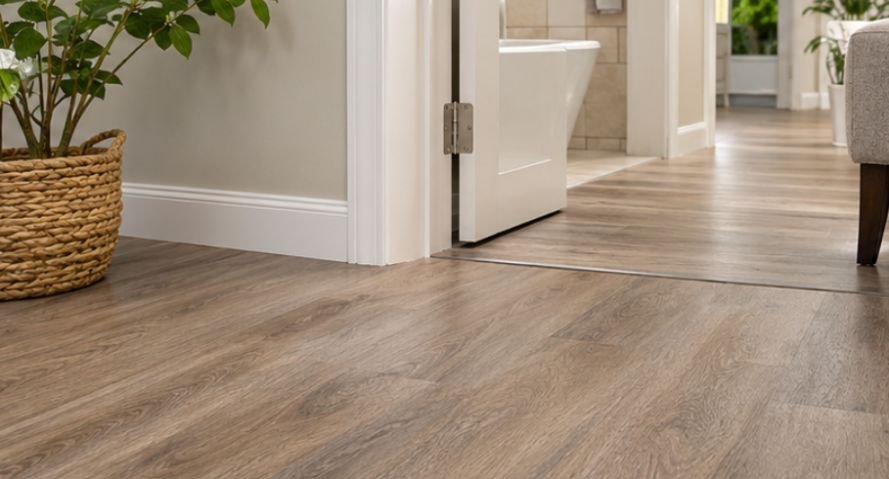
Removing an entire ceramic tile floor might be the most unnecessary expense in your next renovation. In many homes, the existing tiles can serve as a perfectly usable foundation for modern vinyl flooring.
So, can you put vinyl plank flooring over ceramic tile without creating problems? Yes, provided the tiles are firmly attached, sufficiently flat, clean, and free from moisture-related damage.
This approach can eliminate demolition, reduce renovation waste, and make a room feel more comfortable. However, overlooked grout lines, uneven tiles, and insufficient door clearance can turn a straightforward upgrade into an expensive repair. Here’s how to determine whether your existing floor is ready.
Why Installing Vinyl Plank Over Ceramic Tile Makes Sense
Traditional tile removal involves breaking ceramic pieces, scraping mortar, managing dust, and preparing the exposed subfloor.
“Similarly, updating existing kitchen surfaces through painting kitchen cabinets without stripping them can help homeowners refresh their interiors without committing to extensive renovation work.”
Installing luxury vinyl plank (LVP) directly over an acceptable tile surface avoids much of that work.
The advantages include:
- Lower installation costs: Avoiding demolition reduces labor, disposal expenses, and additional subfloor repairs.
- Faster renovations: Homeowners can often complete smaller installations without extensive disruption.
- Improved comfort: Vinyl generally feels warmer and less rigid underfoot than ceramic.
- Reduced noise: Some vinyl products include attached acoustic padding that helps soften footstep sounds.
- Updated appearance: Wood-look vinyl creates a contemporary finish without removing structurally sound flooring.
However, installing another flooring layer increases the finished floor height. This can interfere with doors, appliances, transitions, and existing trim.
The real question is whether those compromises are manageable.
How to Tell Whether Your Ceramic Tile Is Suitable
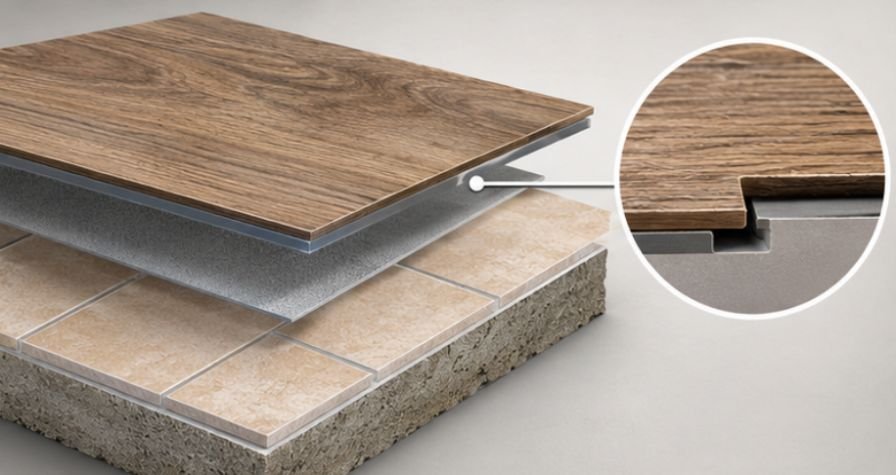
Not every tiled floor provides a reliable base for vinyl planks. Before purchasing materials, examine three important conditions.
Similar surface-related considerations apply when evaluating peel-and-stick backsplash heat resistance behind a stove, as choosing the right materials for existing surfaces is essential for a successful home renovation.
Check for Loose, Cracked, or Hollow Tiles
Walk across the room and inspect damaged sections.
Gently tapping tiles can reveal suspicious hollow-sounding areas, although a hollow sound alone does not prove that a tile has failed.
Look for:
- Tiles that shift when stepped on
- Cracks extending across several tiles
- Missing or crumbling grout
- Raised corners or uneven edges
- Evidence of previous water damage
Loose tiles need secure repairs or replacement before installation.
Covering unstable ceramic flooring does not correct the underlying problem.
Measure Floor Flatness With a Straightedge
A floor can appear level while containing small depressions and raised edges.
Use an 8- to 10-foot straightedge to identify high and low spots.
Some vinyl manufacturers specify a maximum deviation of approximately 3/16 inch across a 10-foot span, but requirements vary by product.
Follow the exact installation instructions for your chosen flooring.
Raised tile edges, commonly called lippage, may require professional grinding or another approved leveling method.
Investigate Moisture Before Covering Anything
Waterproof vinyl planks do not make the entire floor assembly waterproof.
Moisture can remain beneath the surface, potentially creating problems around walls, underlayment, and adjoining materials.
The CDC’s guidance on mold and moisture emphasizes correcting moisture problems rather than simply covering affected building materials.
For basement installations, the Department of Energy’s basement moisture guidance also explains why controlling trapped moisture matters. Check for damp grout, persistent odors, water intrusion, and condensation before proceeding.
Do You Need to Fill Grout Lines Before Installing Vinyl?
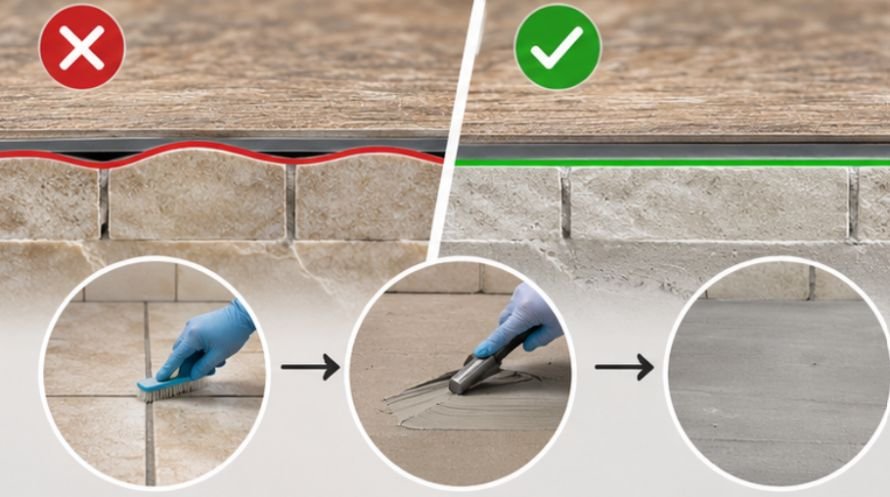
Grout joints are one of the most frequently overlooked installation details.
Deep or wide grout lines can create unsupported areas beneath vinyl flooring. Over time, surface imperfections may become noticeable through certain products.
This effect is called telegraphing.
Thin, flexible vinyl is particularly vulnerable, although rigid-core planks can also experience problems when the surface falls outside manufacturer tolerances.
When Grout Filling Becomes Necessary
Shallow, narrow grout joints may be acceptable beneath certain rigid-core products.
Deeper joints generally require preparation.
A practical approach includes:
- Clean the grout joints thoroughly.
- Remove loose material and residue.
- Apply a compatible cement-based floor patch or skim-coating compound.
- Smooth the material to create a continuous surface.
- Allow it to cure according to the manufacturer’s instructions.
Products such as Henry FeatherFinish may be suitable when their technical instructions permit the application.
Avoid assuming that thick vinyl or attached padding eliminates the need for surface preparation.
Which Vinyl Plank Flooring Works Best Over Tile?
Choosing the correct flooring construction can reduce the likelihood of visible surface imperfections.
SPC Flooring for Greater Rigidity
Stone plastic composite (SPC) vinyl features a dense, rigid core.
Its construction generally makes it more resistant to minor substrate irregularities than flexible vinyl products.
However, SPC still requires a stable, adequately flat foundation.
WPC Flooring for Comfort
Wood plastic composite (WPC) vinyl typically has a more cushioned feel.
It can provide comfortable walking surfaces in living rooms and bedrooms, but its suitability over grout joints depends on the specific product.
The Resilient Floor Covering Institute’s ASSURE certification covers performance and material-quality criteria for both SPC and WPC rigid-core flooring.
For indoor air quality, consider independently certified low-emission products.
The EPA’s flooring material guidance identifies FloorScore certification as one useful consideration when selecting resilient flooring.
How to Install Vinyl Plank Flooring Over Ceramic Tile
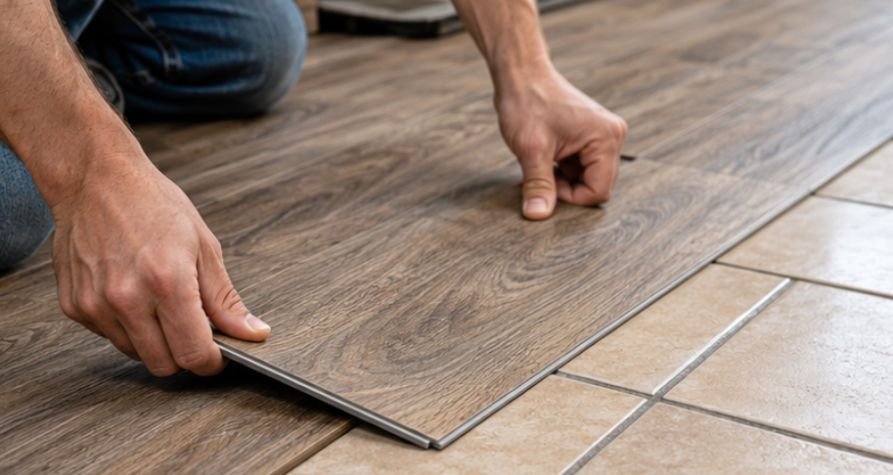
Once the existing surface passes inspection, installation becomes more predictable.
Step 1: Clean and Repair the Tile Surface
Remove grease, dust, wax residue, and loose debris.
Repair damaged areas and confirm that the underlying tile remains secure.
Any patching compounds must be compatible with the existing ceramic surface and the new flooring system.
Step 2: Plan the Floor Height
Calculate the combined thickness of the new planks and any approved underlayment.
For example, a 6-millimeter plank with a 1-millimeter separate underlayment adds approximately 7 millimeters, or 0.28 inches, before accounting for other materials.
Check door swings, dishwasher clearance, cabinet toe kicks, and adjacent floor levels.
Avoid adding separate underlayment unless the flooring manufacturer specifically permits it.
Step 3: Establish the Plank Layout
Measure the room and plan the placement of the first and final rows.
Avoid extremely narrow strips along visible walls.
Stagger end joints according to the manufacturer’s specified minimum spacing.
This creates a more balanced appearance and supports the intended locking-system performance.
Step 4: Install Planks With Expansion Clearance
Most floating vinyl floors require perimeter expansion gaps.
A common requirement is approximately 1/4 inch around walls and fixed structures, although some products specify different clearances.
Use spacers during installation.
Never trap floating planks beneath fixed cabinetry or kitchen islands unless the manufacturer’s instructions expressly allow it.
Step 5: Finish Doorways and Transitions
Undercut door jambs when necessary to create clean edges without restricting floor movement.
Install appropriate transition profiles where vinyl meets carpet, hardwood, or another tiled surface.
Reinstall baseboards or shoe molding without fastening through the floating flooring.
When Installing Over Tile Is a Bad Idea
Some conditions make tile removal or substantial repairs the better option.
Structural Movement or Widespread Tile Failure
Repeated cracking, extensive loose tiles, or visible subfloor movement may indicate a problem beneath the ceramic surface.
Adding vinyl will not stabilize a failing floor.
Investigate the cause before proceeding.
Existing Water Damage
Persistent moisture can affect adhesives, underlayment, and surrounding building materials.
If the tile covers a concrete slab, follow the vinyl manufacturer’s moisture-testing requirements before installation.
Potentially Hazardous Older Flooring Materials
Older homes sometimes contain several flooring layers beneath the visible tile.
If renovation work could disturb suspected asbestos-containing flooring or adhesives, do not grind, scrape, or remove those materials yourself.
The EPA recommends professional assessment when suspected asbestos materials may be disturbed.
Frequently Asked Questions
1. Can you install vinyl plank directly over tile without underlayment?
Yes. Many rigid-core vinyl products include attached padding and do not require additional underlayment. Always follow the manufacturer’s instructions.
2. Will ceramic grout lines eventually show through vinyl?
They can, especially beneath thin or flexible vinyl. Filling deeper joints and correcting surface irregularities helps reduce telegraphing.
3. Is vinyl plank flooring suitable over bathroom ceramic tile?
Yes, when the existing floor is sound and dry. Proper moisture management and manufacturer-approved perimeter detailing remain essential.
4. Does installing vinyl over tile increase floor height?
Yes. The additional thickness can affect doors, appliances, baseboards, and transitions between neighboring rooms.
The Bottom Line: Prepare the Tile Before Covering It
Installing vinyl plank flooring over ceramic tile can be a practical renovation choice, particularly when the existing surface is stable and demolition would add unnecessary expense.
The success of the project depends less on the appearance of the old ceramic and more on what happens beneath the new flooring.
Inspect every questionable tile, measure surface irregularities, address grout depressions, and confirm moisture conditions before installation.
Choose a product specifically approved for installation over existing ceramic tile.
Ultimately, the best flooring renovation is not always the one that removes everything. Sometimes, it is the one that recognizes a reliable foundation already exists.